Showing posts with label Home decor. Show all posts

Monday, June 10, 2013

American Flag from Pallets

So we have really gotten into doing a lot of projects using pallets. I will post more later. But I wanted to tell you about our latest...

the American Flag


Materials Needed:

  • Any used discarded pallet (don't worry about it being perfect or discolored. This will add to it's character)
  • Nails
  • Hammer
  • Paint (I used acylic paint) Red, blue and white
  • Paint brush 
  • Nail puller (To pull apart the pallet)
  • Tape measure
  • Wire hanger and screws
  • Straight level (I think this is what it is called. You know that long thing that helps you level out stuff and draw straight lines)
  • Pencil
  • Work space (Saw horses, table, etc.)


1. Pull apart the pallet using the nail puller and hammer. Or Here is a link to that shows you how to remove the boards from the pallet very easily using a Sawzall.
2. Arrange the boards. I placed mine close together with no spaces between.
3. Flip the boards over so you nail them to the frame. Sorry, I do not have a picture of the back. Basically what I did was use some left over pallet boards (2) and placed them vertical to the front boards all the way to the edge, one on each side. Then nailed them in.
4.For your stripes - Measure the length of your board and divide by 13. We wanted 13 stripes and wanted them all equal sizes. Draw lines with a pencil using the straight leveler.
5. Measure out the section for your stars. My husband did this part and not real sure which method he used. You can just eye ball this part.
6. Paint your blue square
7. Paint the stripes (I was not going to paint the white stripes but since the kids helped we had a few paint drops and was forced to paint them to cover up our mistakes. As you can see, it turned out great anyway)
8. We attached the wire photo hanger with screws. Screw the screws (one on each side) almost all the way in to your frame. Measure your wire to fit. Be sure to wrap it several times around your screws. Tighten your screws securely.
9. then HANG! and enjoy!

We had the best time making this American flag. Most of all we made memories. This is easily a family project where everyone can participate.

This project is not complete. We have a very large " United States Constitution" that we are getting framed and it will go beside this early American 13 colonies flag! I'm just stoked about how it turned out. Not only does this represent our family and our nations history but this will help our children in their studies next year. We are preparing to study the US Constitution starting in the fall. 


Happy Crafting
~Dee Dee~


Monday, April 16, 2012

Monogrammed Door Mat

UPDATE 4/28/2014- These door mats are available for purchase with your initials, sports team, message etc from my Etsy store for only $30.00 at White Sand Creations

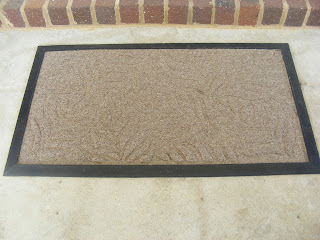
I've had these door mats for a while now. I've been wanting to do something to spruce them up and couldn't come up with anything until now. So here's what I've done! Hold your goose 'cause these are way too cute!

I took a plain mat and cut out our initials using my Cricut. My husband's first initial, our last initial and then my first initial. I used the monogram initial font.


I used the negative and covered the rest of the rug thoroughly to prevent overspray.

I choose Valspar black spray paint from Lowes. This process must be done quickly because drying causes the vinyl to curl.

Here you can see where the vinyl curled when the paint dryed.
Here is the finished product. I placed one at my front door and one at my side door.
I have loved these so much, I kept going back to my doors to look at them. I've gotten several comments about how cute they are. I really like the fact that their is no one else with a door mat like mine, unless you have the same initials!


FYI- Did you know according to etiquette, that the man's initials are to appear first, then the last name initial then the female's initials.


                                                           ~Dee Dee~

June 18, 2013 UPDATE:
As of today, I've had to touch up both mats. Because the mats are raised in some areas some of the paint has worn off. I just used a very large black Sharpie marker to color in those spots. They look new again. I've had many comments both on and off line about my mats. I've enjoyed them immensely.  

July 13, 2013 UPDATE:
Thanks to a reader, I'm reminded that Cricut no longer has a contract with Sure Cuts a Lot. I noticed this came about when Cricut came out with the Gypsy. If anyone has any other suggestions on how they can cut without using a cartridge, please feel free to share. I'm curious!

Follow this blog with bloglovin

Follow on Bloglovin
"I count myself one of the number of those who write as they learn and learn as they write." -John Calvin